

BYOC
Run Github Actions runners in your own cloud infrastructure.
Last updated
Overview
There are three steps to run Github actions workflows in your own cloud infrastructure using WarpBuild:
- Connect your cloud account: Authorize WarpBuild to provision and manage your runners.
- Setup a WarpBuild Stack: Configure a region, VPC, and network settings as context for the runners.
- Create a custom runner: Configure the instance types, disk, and IP configuration for the runners.
Cloud provider specific setup guides for each of the steps are:
AWS
Connect an AWS account, configure a Stack, and launch EC2-backed runners.
GCP
Connect a GCP project and launch Compute Engine-backed runners.
Azure
Connect an Azure subscription and launch VM-backed runners.
Install the WarpBuild Github bot and provide access to the repositories you want to run workflows on, before proceeding with these steps.
Features
- WarpBuild-managed GitHub Actions runners in your AWS, GCP, or Azure account
- Fast setup in three simple steps
- Configurable compute, storage, and networking
- Static IPs
- Standby disks
- Custom VM base images, service roles (IAM, service accounts), and runner configurations
Pay WarpBuild’s platform fee plus infrastructure charges through your cloud account. Choose configurations to suit your performance and budget needs. See pricing.
Setup
Connect your cloud account
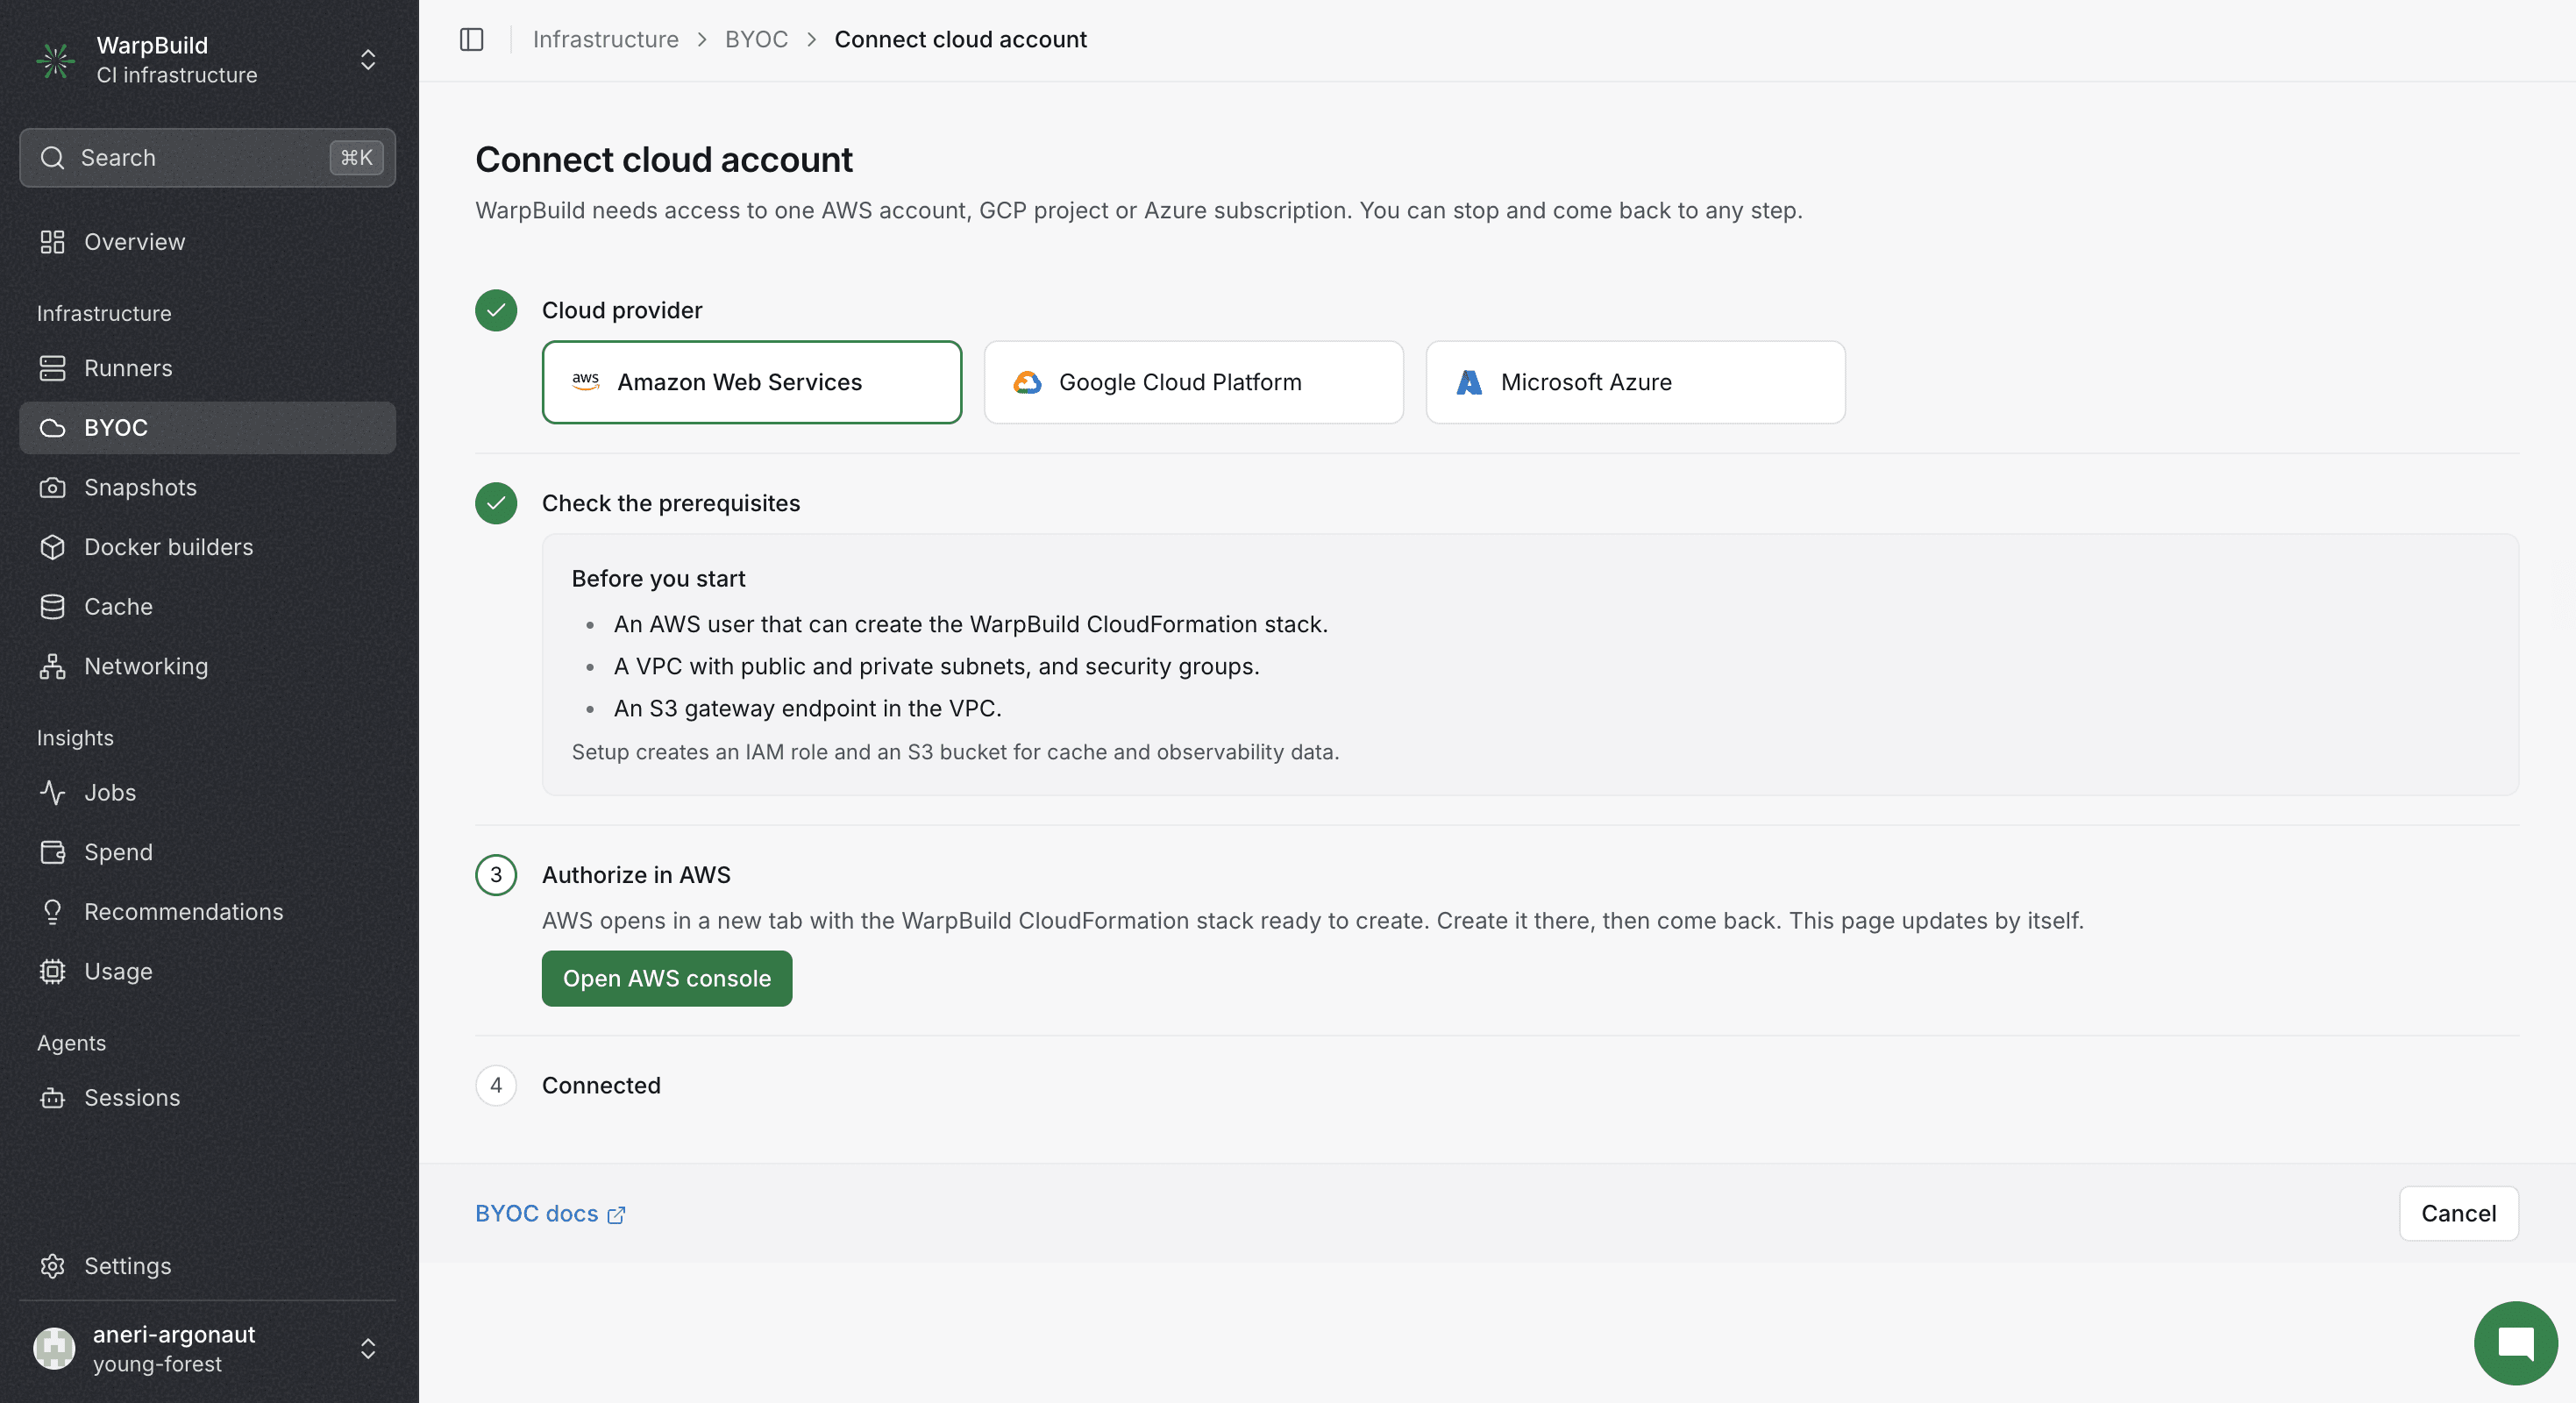
Follow your cloud provider’s setup guide to grant WarpBuild access to manage runners. Then create a WarpBuild Stack with your chosen region and network settings.
Go to BYOC in WarpBuild dashboard and click on the Connect cloud account button.
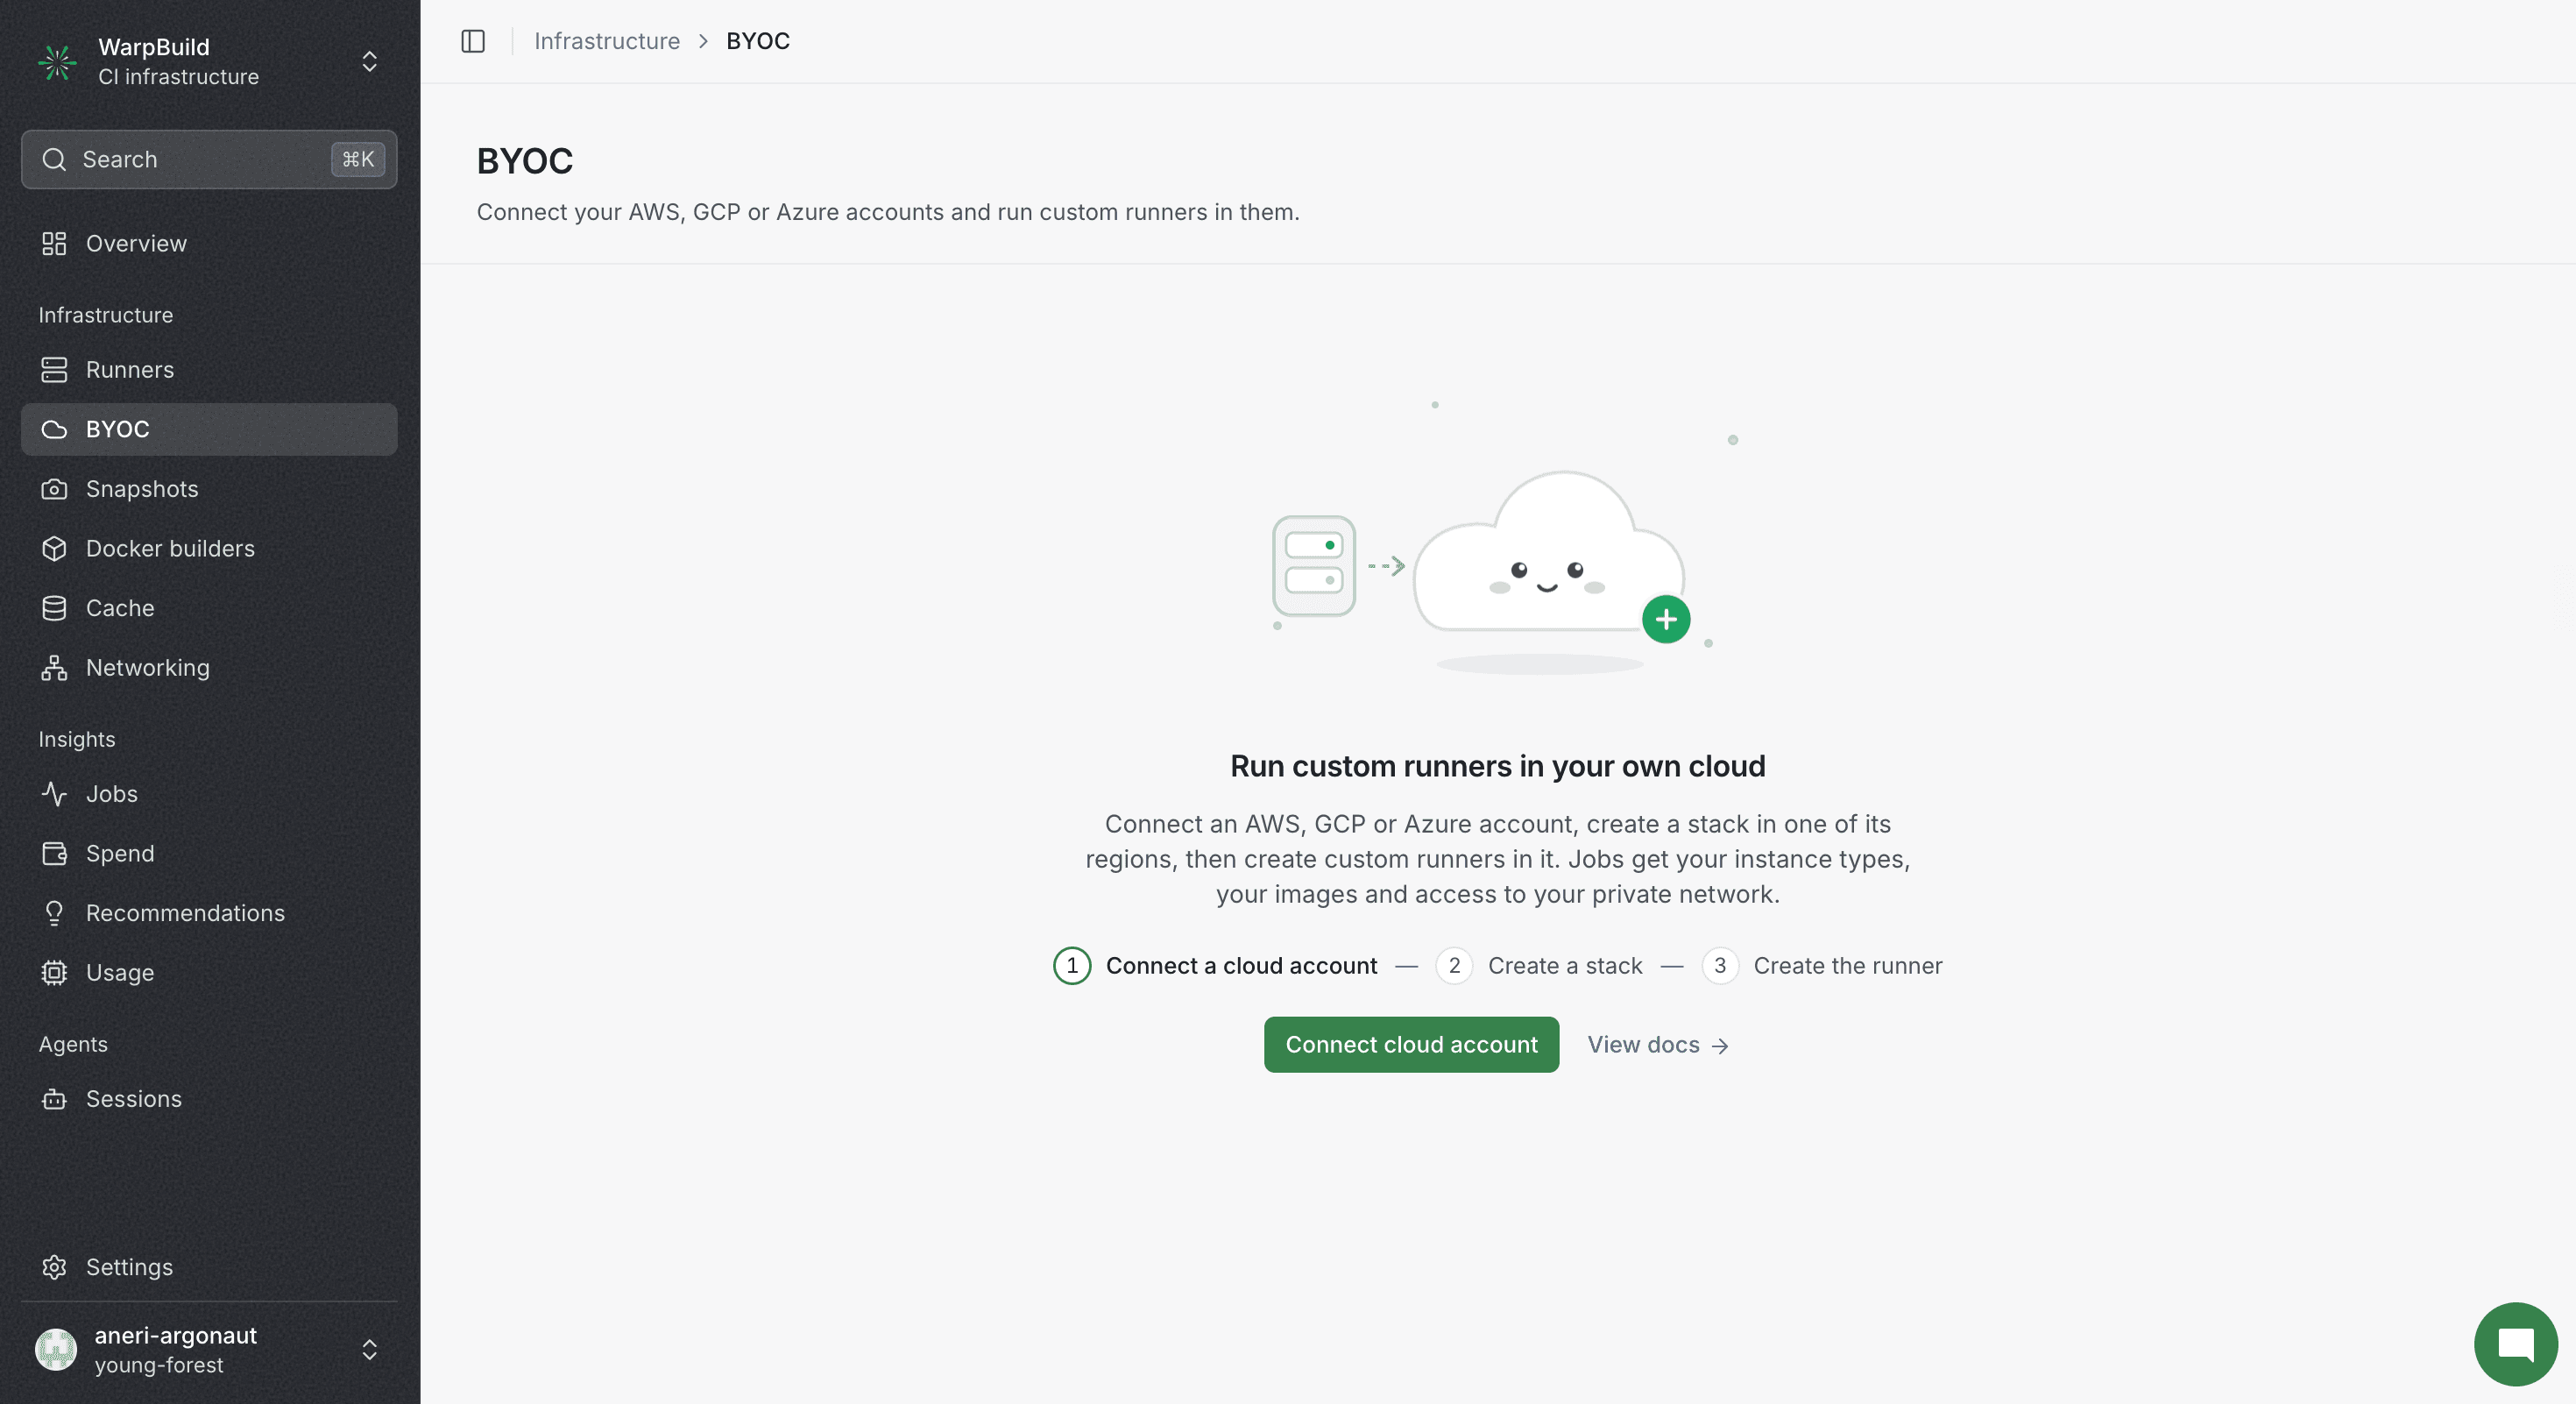
Choose your Cloud provider, check the prerequisites, and authorize WarpBuild in your cloud console. The page updates by itself once the connection is ready.
Setup a WarpBuild Stack
A WarpBuild Stack is a group of infrastructure components in a specific region of your cloud account, required by WarpBuild to run your CI workflows. These components include VPC, subnets, and object storage buckets.
Click on the Create stack button on the BYOC page, then choose the Cloud account and Region for the stack.
Tip
Naming the stack with the product and region info may be helpful for keeping track of resources. Examples: twitch-use1 and alexa-use2.
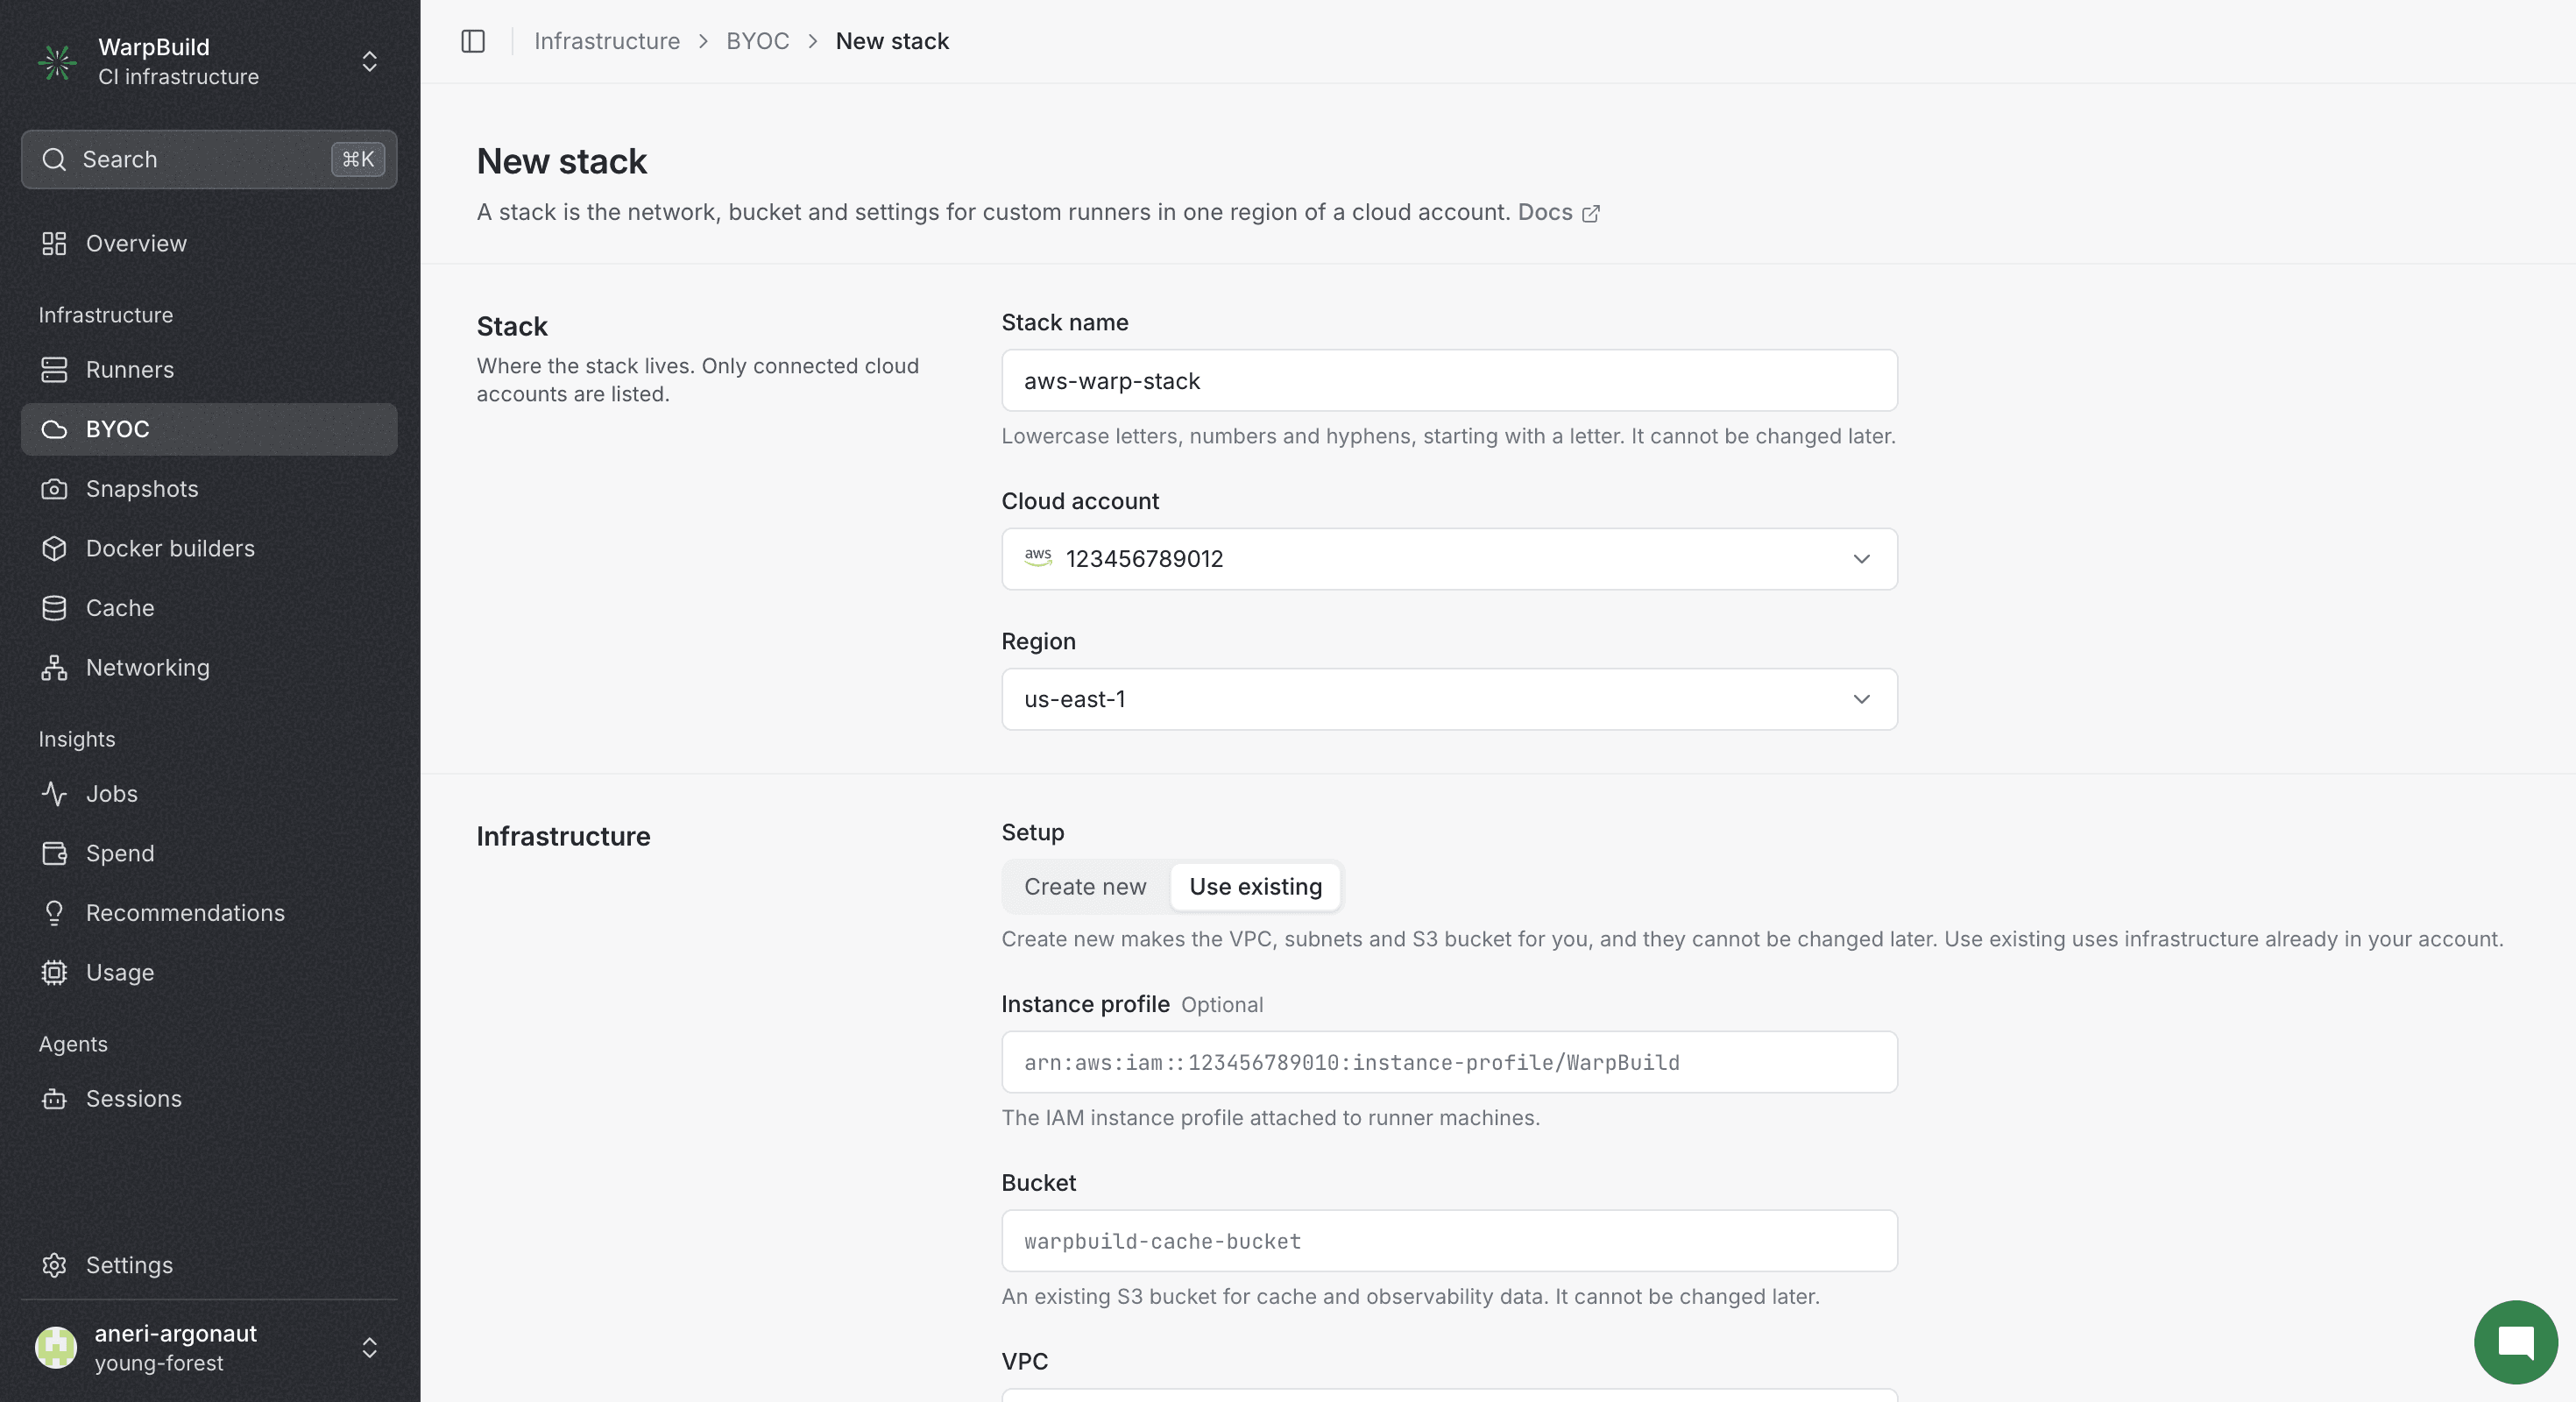
The object storage bucket in the selected region is used as cache storage, container images layer cache, logs, and storing other workflow artifacts.
The stack name, object storage location, and region cannot be changed after creation.
Create new: Create all resources in a new VPC
The Create new setup creates the required resources and configures them according to best practices.
Refer to the cloud provider specific guide for more details on resources created here: aws, gcp.
Use existing: Create runners in an existing VPC
On AWS, select Use existing to run WarpBuild runners in your existing infrastructure. Supply the required resources when creating the stack.
Select your cloud account, region, VPC, and network configuration in which you want to create a Stack. The name of the stack is used for reference throughout the dashboard and cannot be changed after stack creation.
Refer to the cloud provider specific setup guide for more details on the inputs and best practices here.
Create a custom runner
You can now create custom runners that are used in the Github actions workflows.
Click on the New custom runner button and choose the Stack you just created from the Stack dropdown.
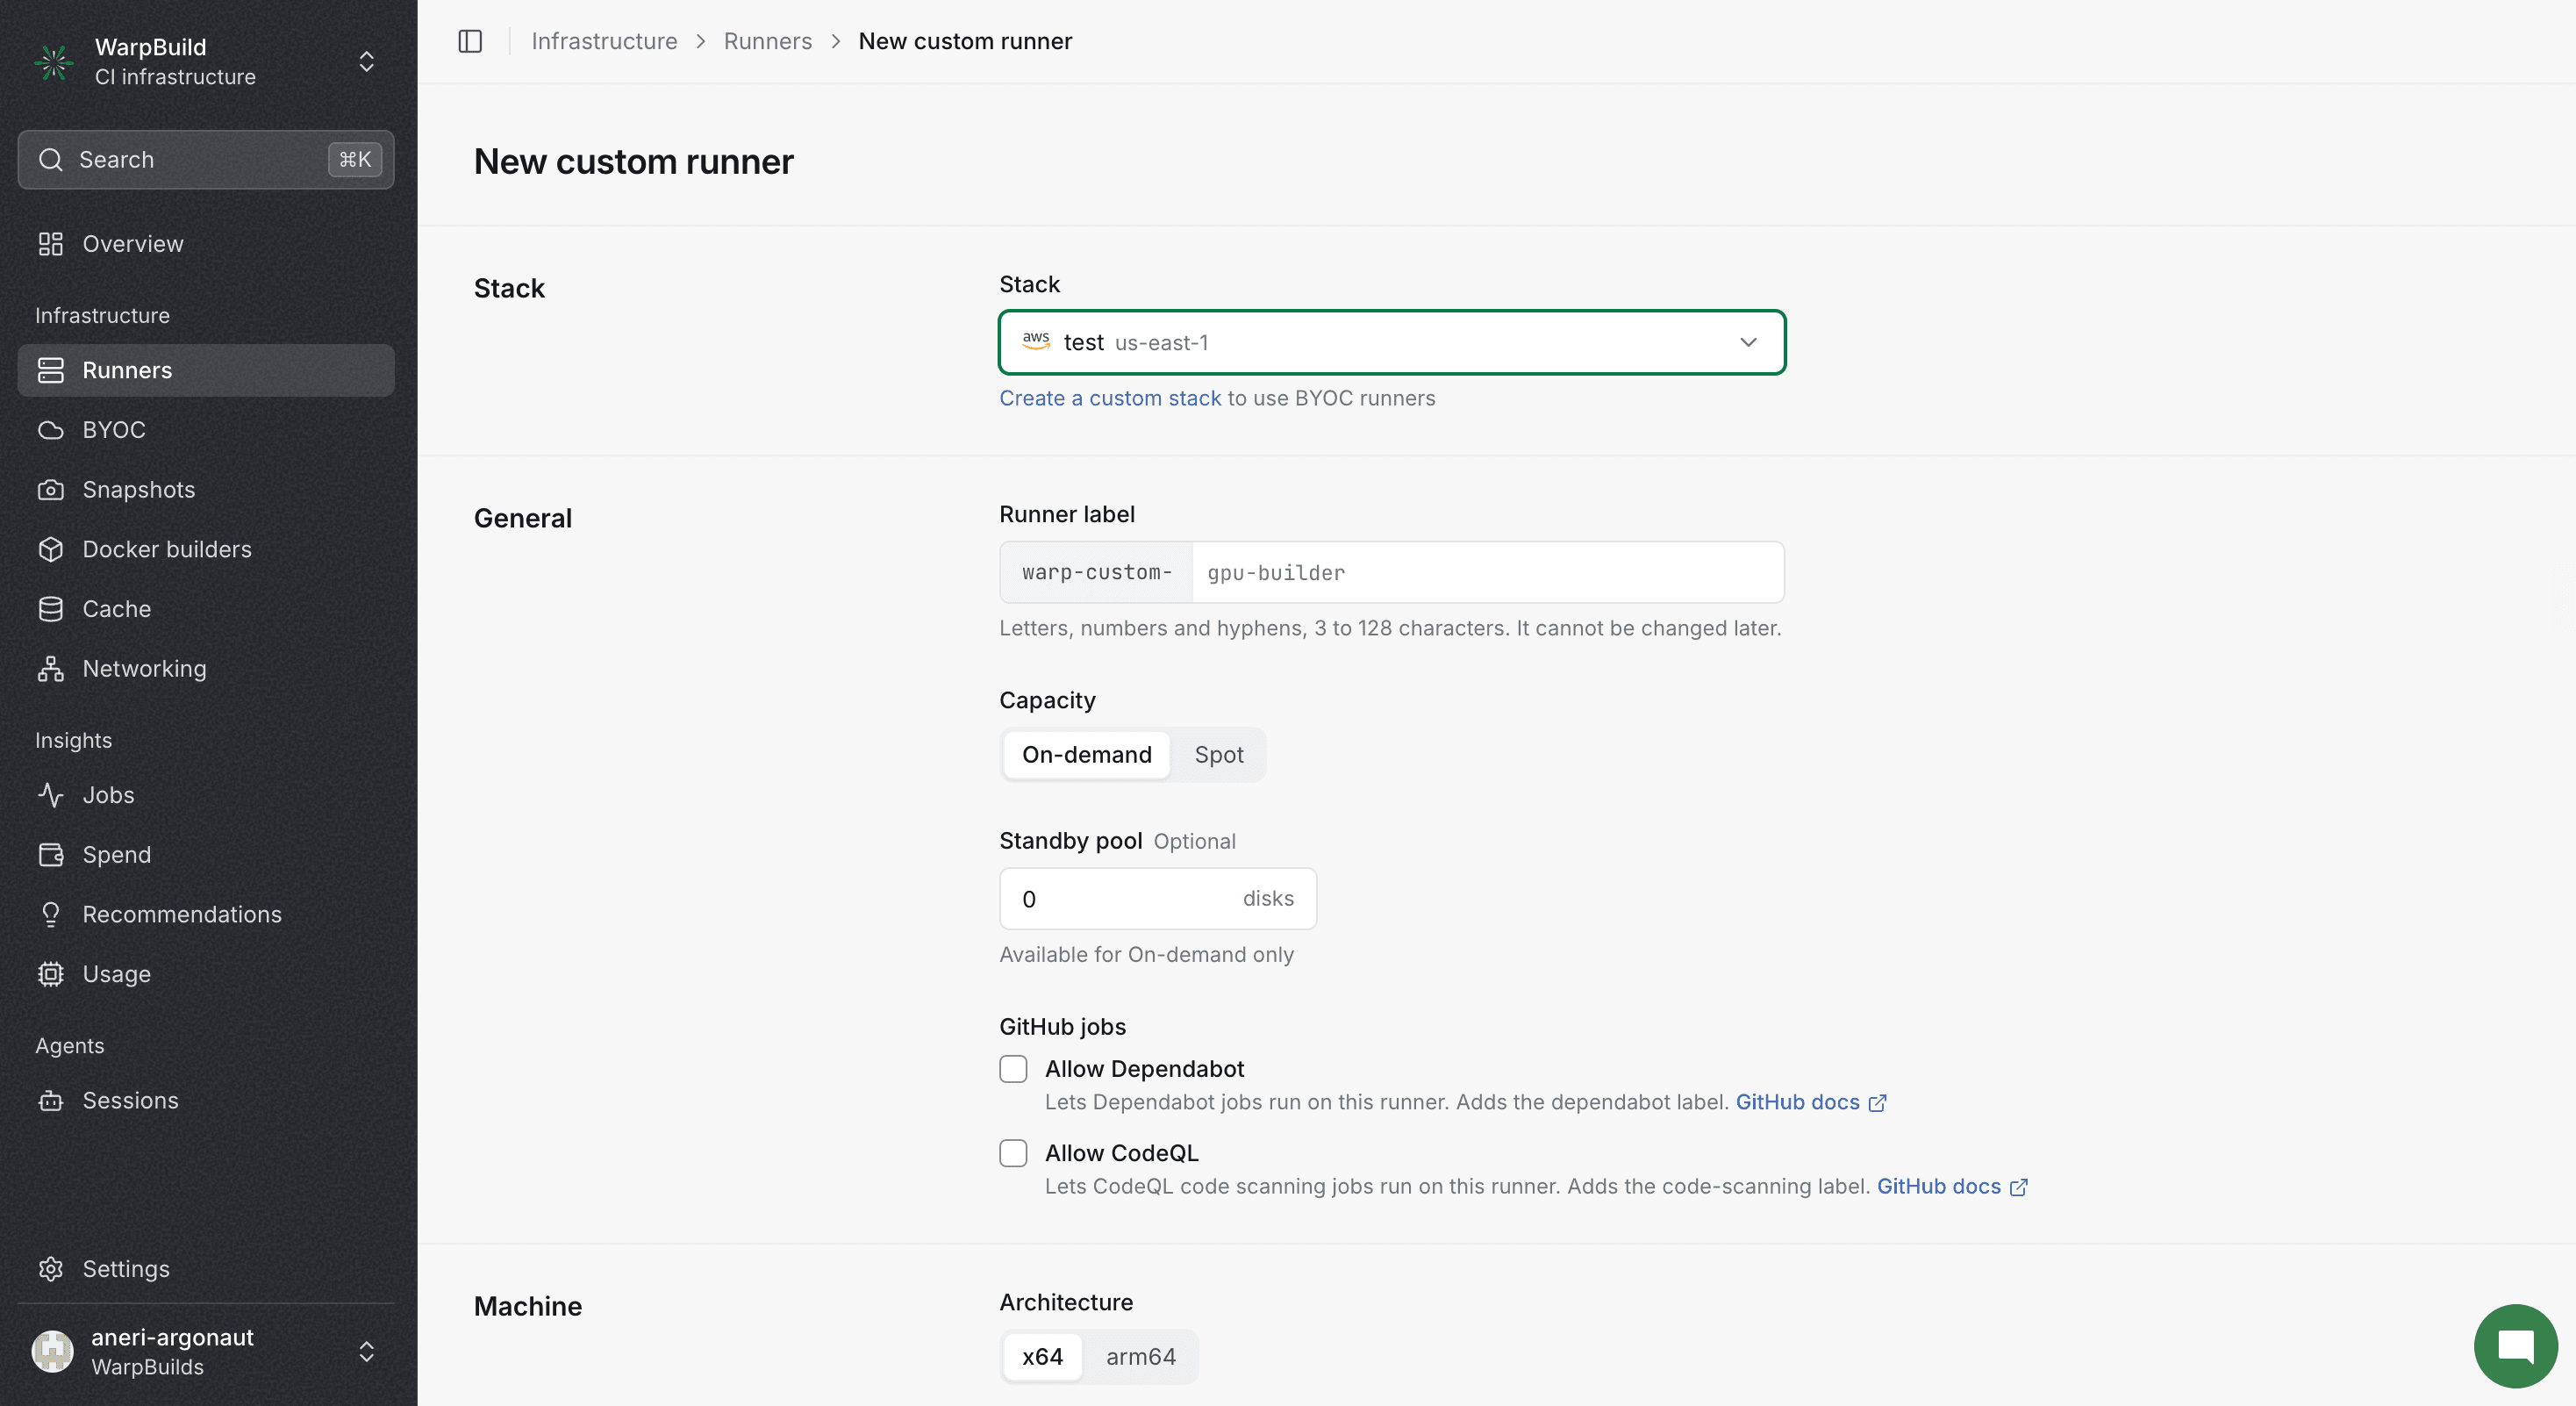
Reference the runner in your workflow using its runner label. This can be found in the Label column on the Custom tab of the Runners page. It is the full name prefixed with warp-custom-.
name: CI
on: [push]
jobs:
  build:
    # Use the full runner label (the "warp-custom-" prefix is required)
    runs-on: warp-custom-ci-stack-runner
    steps:
      - uses: actions/checkout@v3
      - run: npm run build
Fallback instances
You can provide multiple instance types within the same runner configuration. This is useful when the capacity for a specific instance type is unavailable in a region, in which case the runner can fallback to a different instance type. For this reason, it is recommended to choose instances with roughly similar performance to ensure consistency (for example, m7a.xlarge and m7i.xlarge on aws).
This is especially useful for spot instances. The instance type is chosen based on availability and price.
Static IPs
Use static IPs when services require your CI traffic to come from an allowlisted IP address. On AWS, runners use private subnets behind a NAT gateway. Costs include:
- Internet egress: Outbound traffic from runners to the internet is billed at the applicable AWS data transfer rate.
- NAT gateway processing: Charged per GB processed, including inbound and outbound traffic. AWS’s US East (Ohio) example uses $0.045/GB, plus $0.045 per gateway-hour.
- Cross-Availability Zone transfer: Additional charges can apply when runners and their NAT gateway are in different Availability Zones.
Rates vary by region and destination. Check Amazon VPC pricing before estimating costs.
Without static IPs, AWS runners use public subnets without a NAT gateway, avoiding NAT gateway charges. Other networking charges may still apply. See the provider-specific guides for GCP and Azure.
Updates and deletes
WarpBuild may require changes to cloud connections or Stacks to support new features. These will show up as updates and need to be applied.
Deleting a cloud account: Choose Delete account from the account's ... menu on the Cloud accounts tab. A confirmation will be shown along with the list of Stacks that depend on this cloud account. The cloud account cannot be deleted until the stacks depending on it are deleted.
Deleting a Stack: Choose Delete stack from the ... menu on the stack's page. A confirmation will be shown along with the list of custom runner configurations that depend on this stack. The stack cannot be deleted until the custom runner configurations depending on it are deleted.