A Complete Guide to Self-hosting GitHub Actions Runners
Comprehensive guide to self-hosting GitHub Actions runners on AWS
Self-Hosting GitHub Actions Runners on AWS: A Comprehensive Guide
GitHub Actions has rapidly become a favourite tool for CI/CD, thanks to its seamless integration with GitHub repositories and its extensive marketplace of pre-built actions. However, in cases where you need more control over the environment, security, or costs, self-hosting your runners can be a beneficial strategy. AWS provides robust and scalable infrastructure that can be tailored to host self-managed GitHub Actions runners. In this blog post, we will explore various methods to deploy these runners on AWS, detailing the steps involved and discussing the pros and cons of each approach.
Method 1: Using EC2 Instances
One straightforward way to host GitHub Actions runners is by using Amazon EC2 instances. This method gives you full control over the compute environment.
Steps
1. Set Up an EC2 Instance
Start by launching an EC2 instance from the AWS Management Console or AWS CLI. An instance with 2 vCPUs and 4GB RAM (e.g., t3.medium) is a good starting point. Ensure the security group allows outbound connections to access GitHub and any other needed resources. Attach an EBS volume for persistent storage if required. 100GB is a good root volume size for most use cases.
In this guide, we will use Ubuntu 22.04 as the base OS for the EC2 instance.
2. Install GitHub Actions Runner
-
Go to your GitHub organization's settings and then go to
ActionsRunners. Click onNew runnerand chooseNew self-hosted runner. Choose Linux as the OS and x64 as the architecture.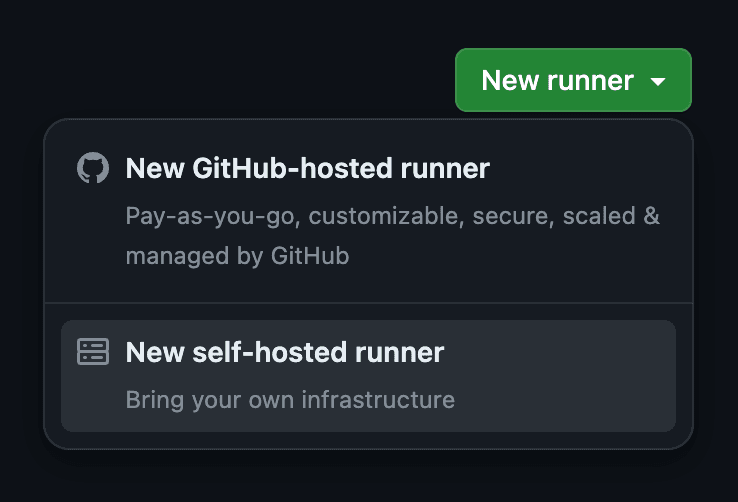
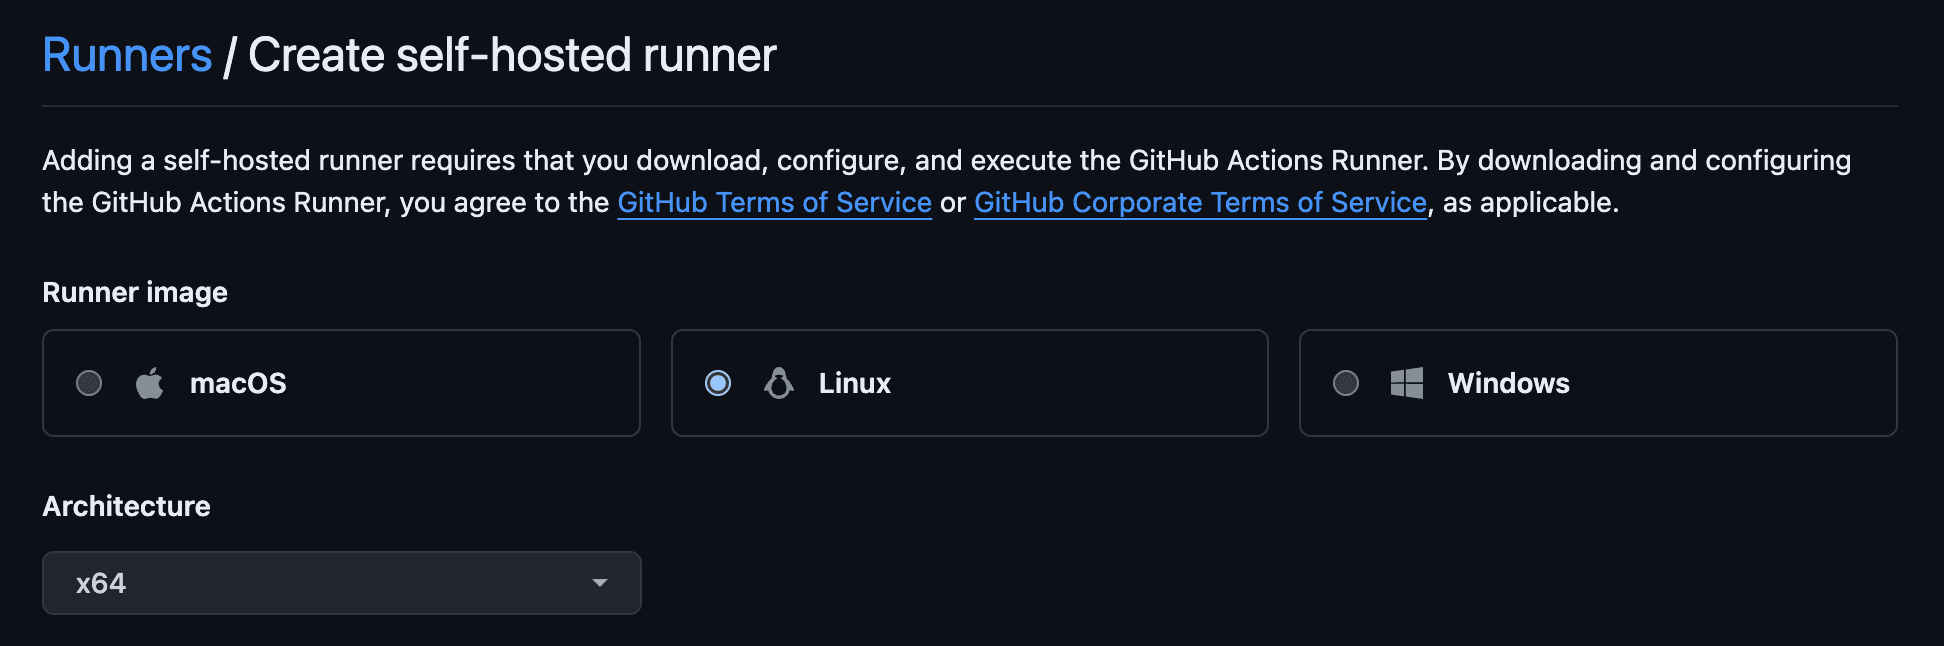
You can directly go to the following URL (after replacing
ORGwith your GitHub organisation name) to get to the runner setup page along with the OS and architecture pre-selected:https://github.com/organizations/ORG/settings/actions/runners/new?arch=x64&os=linuxThe configuration should look like this:
[!NOTE]
If you want to create a runner only for a specific repository, you can do so by going to the repository's settings and following the same steps. The direct link looks like this:
https://github.com/ORG/REPO/settings/actions/runners/new?arch=x64&os=linux -
Follow the instructions on that page to download, configure and start the runner on your EC2 instance.
[!TIP]
Instead of starting the runner with ./run.sh, you can run it as a service to ensure it starts automatically on boot and restarts if the app or the host machine crashes. After successfully configuring with the config.sh script, you get a svc.sh script that can be used to install the runner as a service:
sudo ./svc.sh install && sudo ./svc.sh startLearn more about running it as a service here.
Pros
- Full Control: Customize the OS, installed software, and hardware specifications as needed.
- Cost-Effective: Particularly with spot instances or reserved instances for long-term use.
Cons
- Maintenance Overhead: Requires regular updates for said software and monitoring.
- Scalability Issues: Manually managing multiple runners can be cumbersome.
References
- AWS EC2: https://aws.amazon.com/ec2/
- Adding self-hosted GitHub Actions Runner: https://docs.github.com/en/actions/hosting-your-own-runners/managing-self-hosted-runners/adding-self-hosted-runners
Method 2: Using ECS (Elastic Container Service)
ECS allows you to run containers directly and can be an efficient way to manage GitHub Actions runners, especially if you prefer using Docker containers.
Steps
1. Create a Docker Image
- Dockerfile: Create a Dockerfile that installs the GitHub Actions runner. The following Dockerfile installs the runner and its dependencies on an Ubuntu 22.04 base image. On container start, it registers a new runner with GitHub and starts the runner.
  FROM amd64/ubuntu:22.04
  RUN apt-get update && apt-get install -y curl sudo jq

  ADD https://github.com/actions/runner/releases/download/v2.316.0/actions-runner-linux-x64-2.316.0.tar.gz runner.tar.gz

  RUN newuser=runner && \
  		adduser --disabled-password --gecos "" $newuser && \
  		usermod -aG sudo $newuser && \
  		echo "$newuser ALL=(ALL) NOPASSWD:ALL" >/etc/sudoers

  USER runner
  WORKDIR /home/runner

  RUN sudo mv /runner.tar.gz ./runner.tar.gz && \
  		sudo chown runner:runner ./runner.tar.gz && \
  		mkdir runner && \
  		tar xzf runner.tar.gz -C runner && \
  		rm runner.tar.gz
  WORKDIR /home/runner/runner

  RUN sudo ./bin/installdependencies.sh

  COPY start.sh start.sh
  ENTRYPOINT ["./start.sh"]
The above Dockerfile assumes that the following start.sh script is present in the same directory as the Dockerfile.
#!/bin/bash
set -euo pipefail

check_env() {
    if [ -z "${GITHUB_PAT:-}" ]; then
        echo "Env variable GITHUB_PAT is required but not set"
        exit 1
    fi

    if [ -z "${GITHUB_ORG:-}" ]; then
        echo "Env variable GITHUB_ORG is required but not set"
        exit 1
    fi
}

register_runner() {
    local github_token=$(curl -sL \
        -X POST \
        -H "Accept: application/vnd.github+json" \
        -H "Authorization: Bearer $GITHUB_PAT" \
        -H "X-GitHub-Api-Version: 2022-11-28" \
        https://api.github.com/orgs/$GITHUB_ORG/actions/runners/registration-token | jq -r .token)

    ./config.sh --unattended --url https://github.com/$GITHUB_ORG --token $github_token
}

check_env
register_runner
./run.sh
You can configure the runner name and labels by passing additional arguments to the config.sh script. For example, to set the runner name, use --name RUNNER_NAME. Use ./config.sh --help to see all available options. Options are attached below for your reference:
Configuration Options
$ ./config.sh --help

Commands:
./config.sh Configures the runner
./config.sh remove Unconfigures the runner
./run.sh Runs the runner interactively. Does not require any options.

Options:
--help Prints the help for each command
--version Prints the runner version
--commit Prints the runner commit
--check Check the runner's network connectivity with GitHub server

Config Options:
--unattended Disable interactive prompts for missing arguments. Defaults will be used for missing options
--url string Repository to add the runner to. Required if unattended
--token string Registration token. Required if unattended
--name string Name of the runner to configure (default mac)
--runnergroup string Name of the runner group to add this runner to (defaults to the default runner group)
--labels string Custom labels that will be added to the runner. This option is mandatory if --no-default-labels is used.
--no-default-labels Disables adding the default labels: 'self-hosted,OSX,Arm64'
--local Removes the runner config files from your local machine. Used as an option to the remove command
--work string Relative runner work directory (default \_work)
--replace Replace any existing runner with the same name (default false)
--pat GitHub personal access token with repo scope. Used for checking network connectivity when executing `./run.sh --check`
--disableupdate Disable self-hosted runner automatic update to the latest released version`
--ephemeral Configure the runner to only take one job and then let the service un-configure the runner after the job finishes (default false)

Examples:
Check GitHub server network connectivity:
./run.sh --check --url <url--pat <pat>
Configure a runner non-interactively:
./config.sh --unattended --url <url--token <token>
Configure a runner non-interactively, replacing any existing runner with the same name:
./config.sh --unattended --url <url--token <token--replace [--name <name>]
Configure a runner non-interactively with three extra labels:
./config.sh --unattended --url <url--token <token--labels L1,L2,L3- Build the Docker image with an appropriate tag.
docker build -t github-runner .
2. Push to ECR (Elastic Container Registry)
- Create Repository: Create a new repository in ECR from AWS Console or AWS CLI.
- Authenticate Docker: Authenticate your Docker client to your default registry.
aws ecr get-login-password --region YOUR_REGION | docker login --username AWS --password-stdin YOUR_ECR_REPOSITORY_URL - Tag and Push: Tag your Docker image and push it to ECR.
docker tag github-runner:latest YOUR_ECR_REPOSITORY_URL:YOUR_TAG
docker push YOUR_ECR_REPOSITORY_URL:YOUR_TAG
3. Deploy on ECS
-
Create Cluster: Set up an ECS cluster from the AWS Management Console or AWS CLI which uses
t3.mediuminstances. Your infrastructure should look like this: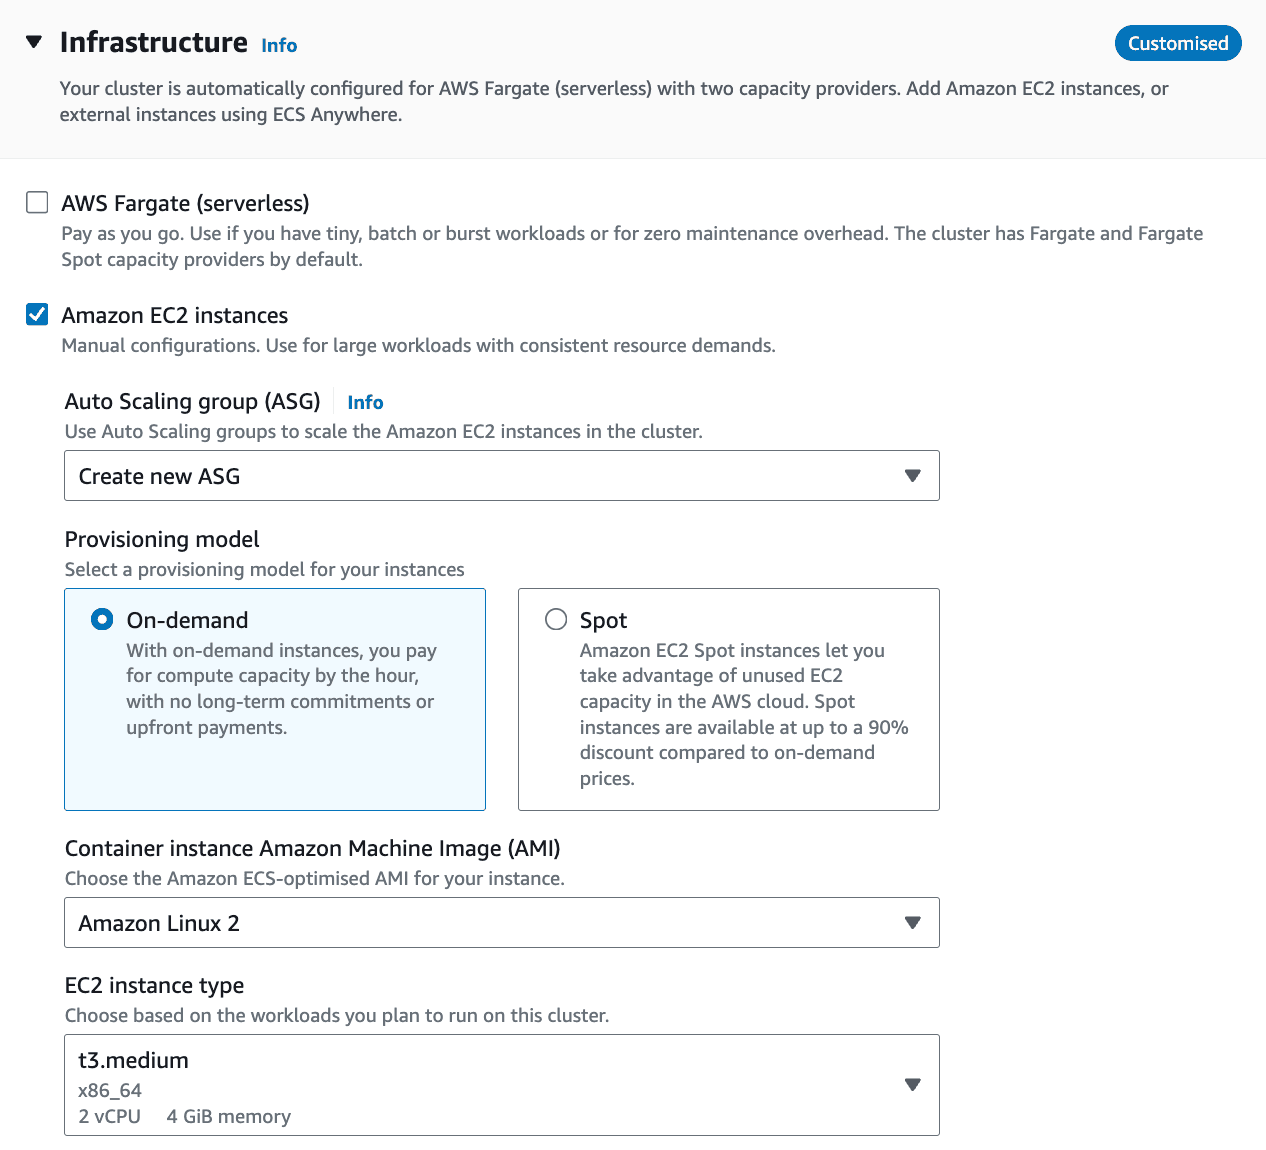
-
Create a secret using AWS Secret Manager to store the GitHub PAT:
aws secretsmanager create-secret --region us-east-2 --name github_runner_ecs_secrets --secret-string '{ "github_pat": "<YOUR_GITHUB_PAT>" }'You can also store the GitHub organization name in the same secret or use it as an environment variable in the ECS task definition.
-
Create an ECS Task Execution role. The
executionRoleArnfield is required for tasks to interact with other AWS services. You can create a new role with the necessary permissions or use an existing one. Learn about the role and how to create it here: Amazon ECS task execution IAM role. You will also need to create an inline policy to allow the container to access the secret. -
Task Definition: Create a new task definition in ECS that uses the Docker image pushed to ECR and the secret in the previous steps. Make sure to replace the placeholders with your actual values.
{ "family": "github-runner", "executionRoleArn": "<YOUR_EXECUTION_ROLE_ARN>", "containerDefinitions": [ { "name": "github-runner", "image": "<YOUR_ECR_REPOSITORY_URL>:<YOUR_TAG>", "memory": 4096, "cpu": 2048, "secrets": [ { "name": "GITHUB_PAT", "valueFrom": "<YOUR_SECRET_ARN>:github_pat::" } ], "environment": [ { "name": "GITHUB_ORG", "value": "<YOUR_ORG>" } ], "logConfiguration": { "logDriver": "awslogs", "options": { "awslogs-create-group": "true", "awslogs-group": "/ecs/github-runners", "awslogs-region": "<REGION>", "awslogs-stream-prefix": "ecs" } } } ] } -
Run Task: Go to the task definition and select the first (or latest) revision. Click on
Deployand thenCreate Service. Choose the cluster you created earlier and select the cluster default capacity provider strategy. In the deployment configuration section give the service a name e.g.,github-runner-serviceand choose an appropriate number of desired tasks (e.g., 3). Click onCreate Serviceto deploy the tasks.
Pros
- Scalability: Easily scale out by adjusting the service's desired count.
- Isolation: Runners operate in isolated environments, improving security.
Cons
- Complexity: Requires familiarity with Docker and AWS ECS.
- Costs: Potentially higher costs depending on the ECS configuration and usage pattern.
- Runner Management: Manually managing multiple runners can be cumbersome.
References
- AWS ECS: https://aws.amazon.com/ecs/
- Docker Basics: https://www.docker.com/101-tutorial
- AWS ECR: https://aws.amazon.com/ecr/
- Task Definitions in ECS: https://docs.aws.amazon.com/AmazonECS/latest/developerguide/task_definitions.html
- https://docs.aws.amazon.com/AmazonECS/latest/developerguide/taskdef-envfiles.html
- https://docs.aws.amazon.com/AmazonECS/latest/developerguide/secrets-envvar-secrets-manager.html
Method 3: Using AWS Fargate
AWS Fargate is a serverless compute engine for containers that works with both Amazon Elastic Container Service (ECS) and Amazon Elastic Kubernetes Service (EKS). It abstracts the server and cluster management and provides a straightforward way to run containers.
Steps
1. Create and Push Docker Image
Follow the same initial steps as for ECS to create and push a Docker image.
2. Configure Fargate Task
-
Fargate Task Definition: Similar to ECS but select Fargate as the launch type.
{
	"requiresCompatibilities": ["FARGATE"],
	"executionRoleArn": "<YOUR_EXECUTION_ROLE_ARN>",
	"networkMode": "awsvpc",
	"cpu": "2048",
	"family": "github-runners",
	"memory": "4096",
	"containerDefinitions": [
		{
			"name": "github-runner",
			"image": "<ECR_REPOSITORY_URL>:<TAG>",
			"essential": true,
			"portMappings": [
				{
					"containerPort": 80,
					"hostPort": 80
				}
			],
			"secrets": [
				{
					"name": "GITHUB_PAT",
					"valueFrom": "<YOUR_SECRET_ARN>:github_pat::"
				}
			],
			"environment": [
				{
					"name": "GITHUB_ORG",
					"value": "<YOUR_ORG>"
				}
			],
			"logConfiguration": {
				"logDriver": "awslogs",
				"options": {
					"awslogs-create-group": "true",
					"awslogs-group": "/ecs/github-runners",
					"awslogs-region": "<REGION>",
					"awslogs-stream-prefix": "ecs"
				}
			}
		}
	]
}
3. Deploy on Fargate
- Create Cluster: Set up an ECS cluster with the Fargate launch type.
- Create a service using the task definition created in the previous step.
Pros
- Serverless: No need to manage servers or clusters.
- Scalable and Isolated: Automatically scales and provides high isolation.
Cons
- Cost: Can be expensive for high compute usage.
- Networking Limitations: Requires good understanding of AWS VPC, subnets, and security groups.
References
- AWS Fargate: https://aws.amazon.com/fargate
- AWS ECS on Fargate: https://docs.aws.amazon.com/AmazonECS/latest/developerguide/AWS_Fargate.html
Advanced Methods for Self-Hosting GitHub Actions Runners on AWS
Following up on our previous exploration of basic methods like using EC2, ECS, and AWS Fargate for hosting GitHub Actions runners, we now get into more sophisticated strategies. These involve Kubernetes solutions and Terraform modules, which can significantly streamline and enhance the management of GitHub runners at scale.
Method 4: Using actions-runner-controller on EKS
actions-runner-controller is a Kubernetes operator designed to automate the deployment, scaling, and management of GitHub Actions self-hosted runners within a Kubernetes cluster. It supports features like automatic scaling based on the number of queued jobs, which makes it highly efficient for dynamic CI/CD environments.
Steps
1. Set Up a Kubernetes Cluster
- Deploy a Kubernetes cluster using Amazon EKS.
- Create a Node group with the desired instance type and capacity. As stated before,
t3.mediuminstances are good enough for most use cases.
  eksctl create cluster \
  		--name <CLUSTER_NAME\
  		--region <YOUR_REGION\
  		--nodegroup-name standard-workers \
  		--node-type t3.medium \
  		--nodes 2 \
  		--nodes-min 2 \
  		--nodes-max 4 \
  		--managed
You can adjust the --nodes, --nodes-min, and --nodes-max values based on your workload and scaling requirements.
-
Configure
kubectlto communicate with your cluster:aws eks --region <YOUR_REGIONupdate-kubeconfig --name <CLUSTER_NAME>
2. Install actions-runner-controller
-
Install and setup the controller using Helm:
NAMESPACE="arc-systems"
helm install arc \
    --namespace "${NAMESPACE}" \
    --create-namespace \
    oci://ghcr.io/actions/actions-runner-controller-charts/gha-runner-scale-set-controller
3. Setup a runner scale set
-
Create a separate Kubernetes namespace for the runner pods:
kubectl create namespace arc-runners -
Create a GitHub App that will be used to authenticate the runners. Install the app in your organization.
-
From the app's dashboard, generate a private key file (
*.pem) and get the App ID. Get the installation ID from the app installation page's URL which is of the form:https://github.com/organizations/ORGANIZATION/settings/installations/INSTALLATION_IDFor detailed instructions about the above two steps, follow the official documentation: Authenticating ARC with a GitHub App.
-
Store the app ID, installation ID and the private key in a Kubernetes secret:
kubectl create secret generic github-secrets \ --namespace=arc-runners \ --from-literal=github_app_id=123456 \ --from-literal=github_app_installation_id=654321 \ --from-file=github_app_private_key=YOUR_APP_NAME.DATE.private-key.pem -
Configure a scale set for your organization or repo:
INSTALLATION_NAME="arc-runner-set"
NAMESPACE="arc-runners"
GITHUB_ORG="YOUR_ORG"
GITHUB_REPO="" # If you want to use a org-level runner, leave this empty

helm upgrade --install "${INSTALLATION_NAME}" \
  --namespace "${NAMESPACE}" \
  --set githubConfigUrl="https://github.com/$GITHUB_ORG/$GITHUB_REPO" \
  --set githubConfigSecret=github-secrets \
  oci://ghcr.io/actions/actions-runner-controller-charts/gha-runner-scale-set
Pros
- Auto-Scaling: The controller automatically adjusts the number of runners based on the workload.
- Efficiency: Reduces costs by scaling down to zero when no jobs are queued.
- Security: Uses GitHub App authentication for secure communication with least number of privileges.
Cons
- Setup Complexity: Requires a moderate understanding of Kubernetes and Helm.
- Overhead: More Kubernetes resources to manage.
- GitHub App Configuration: Setting up the GitHub App can be a bit involved.
References
- actions-runner-controller GitHub: https://github.com/actions/actions-runner-controller
- Helm Installation: https://helm.sh/docs/intro/install
- GitHub Apps: https://docs.github.com/en/apps
Method 5: Philips Terraform Module
The Philips software team has developed a Terraform module specifically for deploying self-hosted GitHub Actions runners on AWS.
Steps
1. Set Up Terraform
- Ensure Terraform is installed and configured to manage your AWS resources.
2. Use the Philips Module
-
Write Configuration: Define your Terraform configuration using the Philips module.
module "github-runner" { source = "philips-labs/github-runner/aws" version = "REPLACE_WITH_VERSION" aws_region = "eu-west-1" vpc_id = "vpc-123" subnet_ids = ["subnet-123", "subnet-456"] prefix = "gh-ci" github_app = { key_base64 = "base64string" id = "1" webhook_secret = "webhook_secret" } webhook_lambda_zip = "lambdas-download/webhook.zip" runner_binaries_syncer_lambda_zip = "lambdas-download/runner-binaries-syncer.zip" runners_lambda_zip = "lambdas-download/runners.zip" enable_organization_runners = true } -
Initialize and Apply: Initialize Terraform and apply the configuration to set up the runners.
terraform init
terraform apply
Pros
- Infrastructure as Code: Easy versioning, auditing, and replication of infrastructure.
- Scalable and Flexible: Easily adjust settings and scale resources through code.
Cons
- Initial Learning Curve: Requires understanding of Terraform and AWS.
- Terraform Management: Need to manage Terraform state and possibly costs associated with state storage.
References
- Philips Labs GitHub Runner Module: https://github.com/philips-labs/terraform-aws-github-runner
- Terraform AWS Provider: https://registry.terraform.io/providers/hashicorp/aws/latest/docs
Method 6: Self-Hosting on Kubernetes
Deploying directly on a Kubernetes cluster gives you full control over the environment and may reduce costs compared to using Fargate.
Steps
1. Prepare the Kubernetes Cluster
- Set up a Kubernetes cluster on AWS, either through EKS or manually with EC2 instances.
2. Deploy Runner Manually
-
Create Docker Image: Build and push the Docker image just as you did when setting up ECS.
-
Add Secrets: Store the GitHub PAT in a Kubernetes secret:
kubectl create secret generic github-secrets --from-literal=github_pat=<YOUR_GITHUB_PAT> -
Deploy Pods: Write Kubernetes deployment manifests to specify the pods that will run the GitHub runners.
apiVersion: apps/v1
kind: Deployment
metadata:
	name: github-runner
spec:
	replicas: 2
	selector:
		matchLabels:
			app: github-runner
	template:
		metadata:
			labels:
				app: github-runner
		spec:
			containers:
				- name: runner
					image: <ECR_REPOSITORY_URL:TAG>
					env:
						- name: GITHUB_PAT
							valueFrom:
								secretKeyRef:
									name: github-secrets
									key: github_pat
						- name: GITHUB_ORG
							value: <YOUR_ORG>
Pros
- Complete Control: Full control over the Kubernetes cluster and how it scales.
- Cost-Effective: Potentially lower costs by managing the underlying resources yourself.
Cons
- Complex Configuration: Requires detailed knowledge of Kubernetes.
- Maintenance: You are responsible for all updates, scaling, and health monitoring.
Conclusion
Self-hosting GitHub Actions runners on AWS provides flexibility, control, and potential cost savings, especially for complex workflows that require specific configurations. By choosing the appropriate AWS service-be it EC2, ECS, or Fargate-you can optimize your CI/CD pipeline according to your project's needs. Each method has its trade-offs in terms of complexity, cost, and scalability. Therefore, it's crucial to evaluate your requirements and expertise in AWS services when deciding the best approach for self-hosting GitHub Actions runners.
WarpBuild provides runners with high performance processors, which are optimized for CI and build workloads with fast disk IO and improved caching. Get started today.
Last updated on
RSS feed generator from Markdown files
Generate RSS feeds from Markdown pages.
Self-host GitHub Actions runners with Actions Runner Controller (ARC) on AWS
Self-host GitHub Actions runners with Actions Runner Controller (ARC) on AWS. Includes terraform code, and production ready configurations for `arc` and `karpenter`.